


QuickBooks Update Error 15225, one of the most common errors users may encounter with QuickBooks. It usually appears while downloading or installing the latest release of the software. The main reason behind this QuickBooks update error is the incorrect Internet Explorer configuration.
In this article, we will provide technical information on QuickBooks error 15225. It’s causes, symptoms, and effective solutions to fix this problem forever. Let’s start by understanding the true meaning of the update error.
Table of Contents
- 1 What are the Causes that Trigger the QuickBooks Error 15225?
- 2 What are the Symptoms of the QuickBooks Error 15225?
- 3 How to Rectify the QuickBooks Update Error 15225
- 3.1 Solution 1: Clear SSL State
- 3.2 Solution 2: Install Digital Signature Certificate
- 3.3 Solution 3: Update QuickBooks in safe mode
- 3.4 Solution 4: Include Intuit as Trusted Site
- 3.5 Solution 5: Disable the firewall temporarily
- 3.6 Solution 6: Repair QuickBooks desktop
- 3.7 Solution 7: Do a Clean Installation of QuickBooks Desktop
- 3.8 Step 3: Re-installation of the software
- 3.9 Need Professional Help?
- 4 Frequently Asked Questions
- 5 Adams Williams
What are the Causes that Trigger the QuickBooks Error 15225?
Here is the list of the factors that can trigger the update error code 15225:
- While you are using an outdated digital signature.
- If a firewall or some third-party software is causing the problem.
- QuickBooks Desktop is not installed properly.
- The Windows registry is damaged or corrupted.
- If the QuickBooks company file is damaged, it could be the reason behind this error.
Get Expert Advice to Fix All Accounting & Bookkeeping Problems

What are the Symptoms of the QuickBooks Error 15225?
Certain signs and indicators can forecast the presence of the update error. Hence, you must check if there are any signs and symptoms visible so that you can identify the problem and find the perfect solution for it.
- Sudden blanking of the window now and then.
- Fail to browse the Company files.
- The general delayed operations and functions raise the buffer time.
- Whenever you try to update the installation, the page reloads automatically.
- Sudden shutdown of Desktop or Windows.
How to Rectify the QuickBooks Update Error 15225
Here is a list of the different solutions to fix the update error:
Solution 1: Clear SSL State
It is important to clear the SSL state in Internet Explorer since it can assist you resolve the issue to a great extent. It can be done with the help of the steps given below:
- First, you need to open the Internet Explorer and then you need to press the Gear Icon.
- Next, you need to select Internet Options present in the drop-down menu.
- Press the Content tab.
- You now need to press the Clear SSL State in the section for certifications.
- A confirmation screen will come up on the window. Here you need to press the OK tab.
- In the final step, you need to shut down Internet Explorer and reboot the Explorer.

Solution 2: Install Digital Signature Certificate
An old digital signature certificate or a certificate that is missing can also trigger the update error. Here are the steps to install the digital signature certificate:
- You need to go to the directory that has the QuickBooks files.
- Now press right-click on the icon, QuickBooks Desktop, and then move to the Properties option.
- Now click on the Open File Location option.
- In this folder, you need to look for the QBW32.exe.file.
- Once you have located the file, press right-click on QBW32.exe and select Properties.
- Now, select Intuit Inc. from the particular list after clicking the Digital Signature tab.
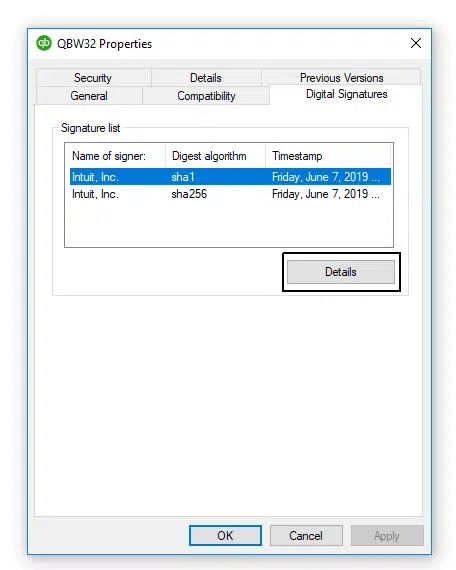
- Now press the Details tab.
- Now select the View Certificate option on the screen for Digital Signature Details.
- Now in the Certificate Screen, press the Install Certificate option.
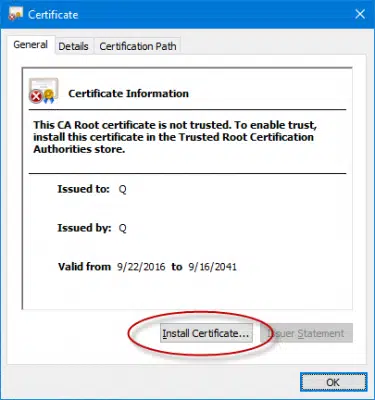
- Press Next and then press on Finish.
- Start the system again and then launch the QuickBooks software once more.
- Try to update the QuickBooks software once more.
Solution 3: Update QuickBooks in safe mode
Updating QuickBooks software is one of the best ways to rectify many error codes in the accounting software. However, one of the main obstacles in the form of error 15225 completely disrupts the overall update process.
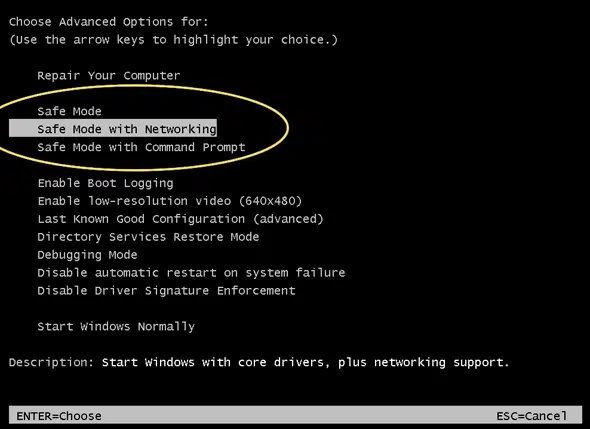
One of the best ways to rectify this error is by running the system in Safe Mode and then beginning to update the QuickBooks software.
- First, you need to restart the system and then keep hitting the F2 key again and again till the Advanced Boot Option Screen appears. Now access the down arrow key present on the keyboard to get the Safe Mode with Networking option.
- Now press the Enter key.
- Now you need to run the QuickBooks Desktop software by clicking twice on the Desktop icon present in QuickBooks.
- Next, go to the Help option and then select the Update QuickBooks Desktop option.
- Then you need to press the Update Now option.
- Now click the option, Get Updates.
- After all the Updates get downloaded, you need to start the system again to begin the automatic installation of such updates.
- Lastly, press the Close option.
Also Read This: Understanding QuickBooks Error 15271: Causes and Solutions
Solution 4: Include Intuit as Trusted Site
When Intuit and its concerned sites are not on the list of the most reliable ones for Internet Explorer, it can lead to update errors in QuickBooks.
To fix this issue, you need to implement the steps given below in the same order:
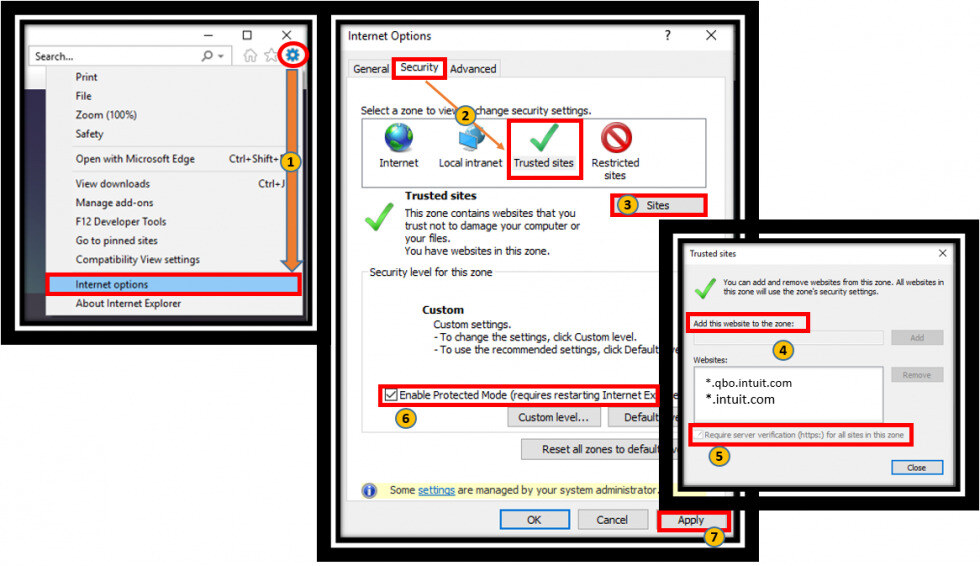
- Open the Internet Explorer web browser.
- Select the Gear icon and press on the Internet Options tab.
- Choose the Security tab and then choose the Trusted Sites.
- Press on the Site option to include the following domains:
- For users who use the US version of QuickBooks, the following sites need to be added:
- QuickBooks.com
- Intuit.com
- For users who use the Canadian version of QuickBooks, the following sites need to be added:
- .quickbooks.ca
- .intuit.ca
- For users who use the US version of QuickBooks, the following sites need to be added:
- Click Close and then press Apply.
- Lastly, press the OK tab.
Solution 5: Disable the firewall temporarily
One possible way to fix the QuickBooks update issue 15225 is by turning the Firewall settings off, which may hamper the smooth installation procedure:
- On your QuickBooks screen, navigate to the Preferences tab and click Security.
- Then click the Privacy tab.
- Now from the Network Protection menu, open Settings.
- Now, press the Windows Security option and then click Firewall and Network Protection.
- Now Deactivate the Defender Firewall from all the Networks and press Domain, Public, and Private Network successfully.
Solution 6: Repair QuickBooks desktop
You can repair QuickBooks via doing the means referenced beneath:
- Most importantly, you need to reboot the system after shutting every one of the projects impeding the QuickBooks programming.
- After that reinforcement the company file.
- And afterward hit the Start choice moving to the control panel, by moving to the Start menu and opening the inquiry bar, trailed by entering the control panel in the pursuit box.
- After opening the control panel, hit a click on the projects and highlights alternative.
- And afterward, click on uninstall program. If you can’t detect the choices, then, at that point, all things considered, select projects and transition to program highlights.
- The subsequent stage is to click on program rundown and afterward click on uninstall, proceed, and next alternatives separately.
- When finished with that you are needed to click on repair alternative and afterward hit straightaway. Additionally, stand by till the opportunity repair measure concludes.
- After that, you need to hit the Finish tab and afterward reboot the system whenever provoked.
- The last advance in this cycle is to download the most recent QuickBooks discharge.
Solution 7: Do a Clean Installation of QuickBooks Desktop
You can perform a clean installation process of the QB. The process includes:
- Uninstalling of the QuickBooks Desktop
- Using QB Clean Install Tool for Windows
- Re-installation of the software
Step 1: Uninstalling of the QuickBooks Desktop
- To begin with, use the Windows + R keys on your computer to start the RUN command
- Then type Control panel into the search field followed by clicking the Ok button
- Now go to Programs and Features tab and select Uninstall a Program from the drop-down menu
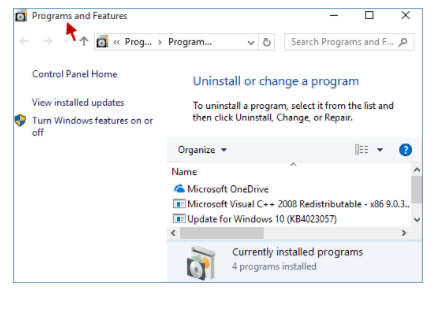
- In the end, from the list of all the Software, select QuickBooks Desktop and Select Uninstall, then follow the on-screen instructions to finish this step.

Step 2: Use the QuickBooks Clean Install Tool for Windows
You’ll need to rename the installation folders in this step which you can do quickly with the QuickBooks clean install tool. The following are the steps to be performed:
- To begin, go to Intuit’s official website and download QuickBooks Tools Hub

- After that, go to the file folder where the download was saved and follow the on-screen installation instructions to install the application
- Once done then click “I Accept” to finish the installation and then access the QuickBooks Tool Hub from the Desktop
- After selecting Installation Issues, go ahead and then click Clean Install Tool

- After that, select the QuickBooks Desktop Version that was previously installed and click Continue

- After some time, the message “Please install your copy of QuickBooks to the default location” will show on your screen; click OK to complete this stage
If you are unable to access QuickBooks while renaming the folders, the following actions should be followed:
- To go to the Task Manager, go to the Windows taskbar >>> Task Manager

- Select the Processes tab and then click the image name column heading
- Then click END after selecting exe, QBDBMgern.exe, qbw32.exe, and QBCFmonitorservice.exe.

- Finally, click “Yes” after receiving a confirmation message.
Step 3: Re-installation of the software
- Follow the onscreen instructions after inserting the QuickBooks Desktop CD
- After the software has been installed, it will prompt you for the product and licensing number

- Next step is enter the information exactly as it was given to you
- To finish the process, enter the above information and then follow the on-screen instructions
- Then press the Next button
- Select Next >>> install after selecting the installation type
- Finally, you are all set to run QuickBooks software.
This will resolve the Update error.
Need Professional Help?
Let our professionals help you securely resolve QuickBooks Update Error 15225 today. Visit Smbaccountants.com and contact us now for expert assistance and a free consultation!
Frequently Asked Questions
Q 1: What is QuickBooks Error 15225?
Ans: It is an update error that usually occurs when QuickBooks can’t verify a file’s digital signature during a payroll or software update.
Q 2: What causes Error 15225 in QuickBooks?
Ans: Common causes include firewall interference, outdated digital signatures, corrupted Windows registry, or incomplete QuickBooks installation.
Q 3: Will I lose my data due to QuickBooks Error 15225?
Ans: No, your financial data is safe. The error only affects the update process, not your actual company files or transactions.
Q 4: How can I fix QuickBooks Error 15225 quickly?
Ans: You can fix it by clearing the SSL state, installing the latest digital signature, running QuickBooks in Safe Mode, or adjusting your firewall.
Q 5: Can I prevent QuickBooks Error 15225 from happening again?
Ans: Yes. Keep QuickBooks updated, use a valid digital signature, allow QuickBooks through your firewall, and regularly maintain your system.

Adams Williams
Adams Williams is a seasoned accounting professional with over 4 years of experience in bookkeeping, financial reporting, and business accounting solutions. Specializing in QuickBooks software, Adams combines technical expertise with clear, accessible content writing to help businesses streamline their financial processes. His insightful guides and how-to articles are crafted to assist both beginners and seasoned users in navigating accounting software with confidence.
