

QuickBooks error 557 typically occurs when you download payroll updates after upgrading to a newer version of QuickBooks. This error can disrupt payroll operations and affect your workflow. If not resolved promptly, this error can also jeopardize your payroll data. Accurate payroll records are essential for business and legal compliance, so addressing this issue is crucial. QuickBooks error 557 is a common payroll error.
QuickBooks Desktop can display one of the following messages:
- QuickBooks has encountered Error 557. The operation cannot be completed.
- Error Code 557: Unable to access the company file.
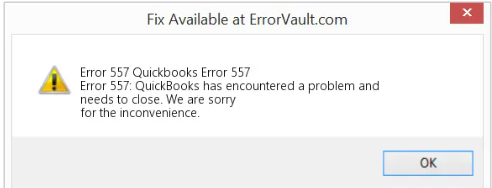
- QuickBooks has encountered a problem and needs to close.
- QBDT Error Code 557: Unexpected termination occurred.
This article explains the causes, symptoms, prerequisites, and step-by-step solutions to fix QuickBooks Error 557 in QuickBooks Desktop.
Table of Contents
- 1 What are the Causes of QuickBooks Error Code 557?
- 2 What are the Symptoms of QuickBooks Error 557?
- 3 Solutions to Fix QuickBooks Error 557 in Desktop
- 3.1 Solution 1: Restore Your System
- 3.2 Solution 2: Modify Windows Registry Settings
- 3.3 Solution 3: Update QuickBooks to the Latest Version
- 3.4 Solution 4. Run QuickBooks as Administrator
- 3.5 Solution 5. Restore Your System to a Previous State
- 3.6 Solution 6: Check and Update Billing Information
- 3.7 Solution 7. Turn Off and On Payroll Services
- 3.8 Solution 8. Enter or Update QuickBooks Service Key
- 3.9 Solution 9: Re-authenticate QuickBooks
- 3.10 Solution 10. Re-activate Payroll Subscription
- 3.11 Solution 11: Repair QuickBooks Installation
- 3.12 Solution 12: Use the Quick Fix My Program Tool
- 3.13 Solution 13: Update the EIN (Employer Identification Number)
- 3.14 Solution 14: Verify and Rebuild the Company File Data
- 3.15 Solution 15: Activate the Direct Deposit Agreement as an Employee
- 4 Conclusion
- 5 Frequently Asked Questions
- 5.1 Can QuickBooks Error 557 affect multiple company files?
- 5.2 Can Windows updates trigger QuickBooks Error 557?
- 5.3 Does reinstalling QuickBooks Desktop fix QuickBooks Error 557?
- 5.4 Can QuickBooks Error 557 occur in multi-user mode?
- 5.5 Does QuickBooks Error 557 damage payroll data?
- 5.6 Related Article:
What are the Causes of QuickBooks Error Code 557?
QuickBooks Desktop (QBDT) Error Code 557 usually appears when payroll subscription or update processes fail. The main causes include:
- Inactive Payroll Subscription.
- Disabled File Copy Service (FCS).
- Corrupted or Damaged Installation.
- Outdated QuickBooks Desktop.
- Security Software Interference.
- Windows Registry Issues.
- Incomplete or Corrupted Downloads.
- Internet Connectivity Problems.
What are the Symptoms of QuickBooks Error 557?
When QuickBooks Error Code 557 occurs, it can disrupt payroll operations and prevent access to essential subscription features. Common signs include:
- Shows “Payroll Subscription is inactive” message.
- Cannot download the latest tax tables.
- Unable to send payroll data.
- Displays “Canceled” or “Suspended” prompt.
- Subscription is active locally but inactive in the portal.
- An error appears when creating paychecks.
- QuickBooks closes unexpectedly.
- Lag when opening payroll forms.
- Cannot sign into the Intuit account.
What are the Prerequisites for Troubleshooting QuickBooks Error Code 557?
Before attempting to fix Error Code 557 in QuickBooks Desktop, ensure the following steps are completed to prevent data loss and make troubleshooting smoother:
- Always create a current backup of your QuickBooks company file.
- Ensure a stable and active internet connection for updates and verification.
- Make sure your QuickBooks version is the latest release.
- Confirm that your payroll subscription is active in the Intuit account portal.
- Use an administrator account on Windows for making system-level changes.
- Turn off the antivirus or firewall temporarily to prevent interference.
- Exit other programs that can interfere with QuickBooks operations.
- Reboot your computer to clear temporary glitches and refresh system resources.
Solutions to Fix QuickBooks Error 557 in Desktop
If you are facing QuickBooks Desktop Error Code 557, following these solutions step by step can help resolve the issue efficiently. Each solution addresses common causes of the error, from subscription problems to software updates.
Solution 1: Restore Your System
Sometimes, reverting your system to an earlier state can quickly fix the issue.
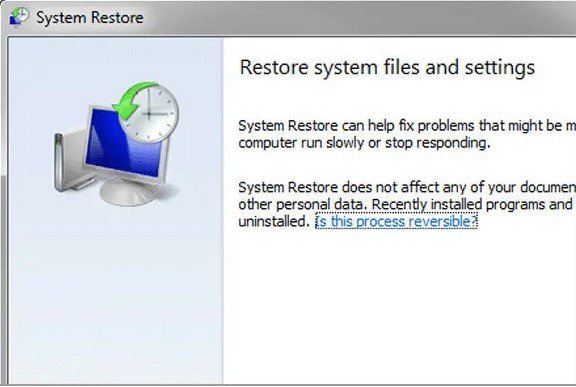
- To begin with, turn on your system and log in using admin credentials.
- Now, head over to the Start menu and look for All Programs.
- From there, go to Accessories, and after that, open System Tools.
- You’ll find the System Restore option; go ahead and click on it.
- In the next step, choose a restore point (pick the most recent one).
- Then, confirm your selection and proceed further.
- Once the process starts, wait for it to complete.
- After that, restart your computer and open QuickBooks again.
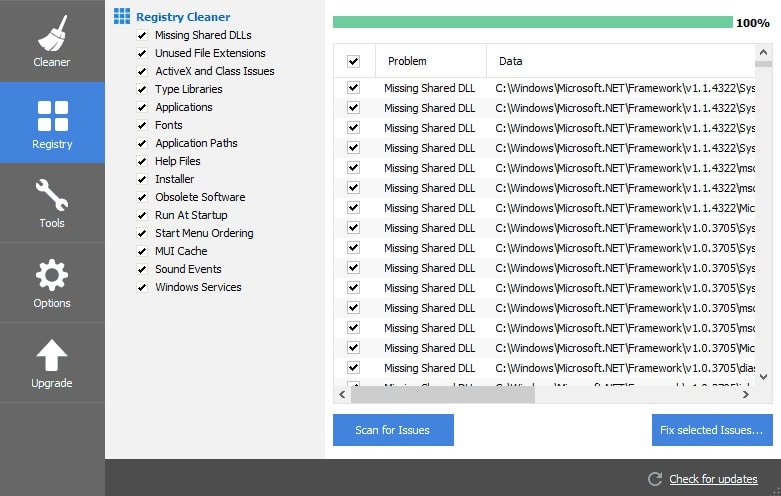
Solution 2: Modify Windows Registry Settings
It helps fix system-level configuration issues, but you have to proceed carefully.
- Open the Start menu and type Run or search directly.
- Then, press Ctrl + Shift + Enter to run it as administrator.
- You can see a prompt; just click Yes to continue.
- Now, type regedit and press Enter.
- Once inside, go to the QuickBooks-related registry key.
- After that, click on the File tab and choose Export.
- You have to pick a location where you want to save the backup.
- Give it a name and make sure the export range is set correctly.
- Then, hit Save and keep the backup for safety.
Solution 3: Update QuickBooks to the Latest Version
Outdated software can often trigger errors, so updating is important.

- Open QuickBooks on your system.
- Then, go to the Help section at the top.
- From there, click on Update QuickBooks Desktop.
- Switch to the Update Now tab.
- After that, click on Get Updates and let it download.
- Once done, restart the software.
- Then, install the updates and check if the issue still appears.
Solution 4. Run QuickBooks as Administrator
Running QuickBooks with administrator privileges can prevent permission issues that trigger Error 557.
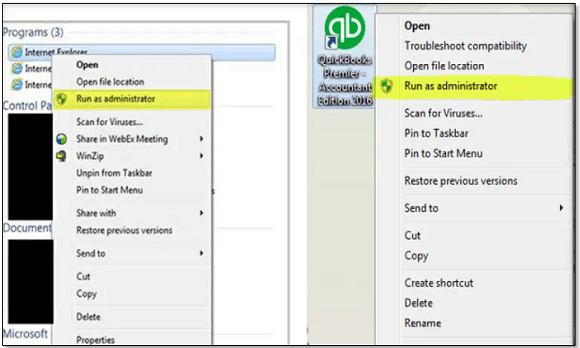
- Close QuickBooks Desktop completely.
- After that, right-click the QuickBooks icon on your desktop and select Run as administrator.
- Once QuickBooks opens, try performing the payroll or subscription action again to see if the error resolves.
Solution 5. Restore Your System to a Previous State
If the error started recently, restoring your system can help you roll back unwanted changes and fix the issue in QuickBooks Desktop.
- Turn on your computer and log in as an administrator.
- Then, go to the Start menu and head over to Programs.
- After that, open Accessories, and from there, you have to select System Tools.
- Now, go to the System Restore option.
- In the next step, a new window will appear. Click Next to proceed.
- Then, you have to choose a restore point from the list (make sure to select the most recent one).
- After that, confirm your selection and continue.
- A confirmation screen will appear; click Next again.
- Once you proceed, the restoration process will begin automatically.
- Finally, after the process completes, restart your system and open QuickBooks to check if the error is resolved.
Solution 6: Check and Update Billing Information
Incorrect subscription details can sometimes create unexpected errors.
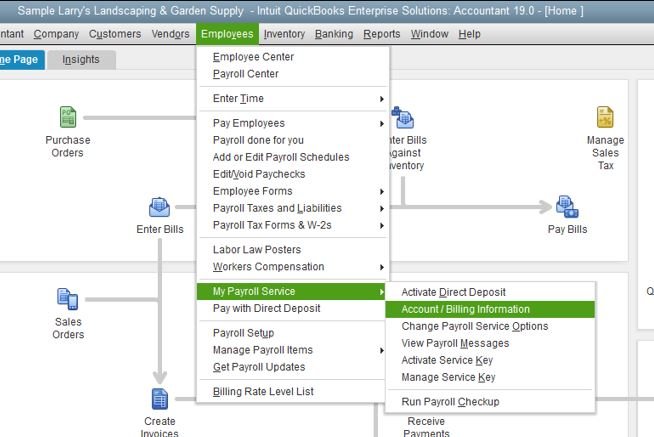
- Log in to your QuickBooks account.
- After that, go to the Products & Services section.
- Now, locate your subscription from the list.
- Then, click on Details to view more information.
- Take a moment to review billing and license data.
- If something looks incorrect, update it right away.
- Finally, save changes and reopen QuickBooks.
Solution 7. Turn Off and On Payroll Services
Refreshing payroll services can help resolve glitches and restore proper functionality in QuickBooks Desktop.
- To start with, open QuickBooks on your system.
- Then, go to the Lists menu and select Chart of Accounts (you can also press Ctrl + A).
- Find the bank account linked to payroll.
- Now, right-click on it and choose Edit Account.
- Go to the Bank Feed Settings tab.
- Select Deactivate All Online Services.
- Click on Save & Close.
- A pop-up message will appear, then click OK to confirm.
- Click Save & Close again to exit.
- Now, you have to go to Payroll Setup.
- Then, set up the bank account again for e-pay and e-file services.
- Return to the Chart of Accounts and open the same account.
- Click on Set Up Bank Feeds to reactivate services.
Solution 8. Enter or Update QuickBooks Service Key
Entering the correct service key helps activate payroll services and resolve related issues in QuickBooks Desktop.
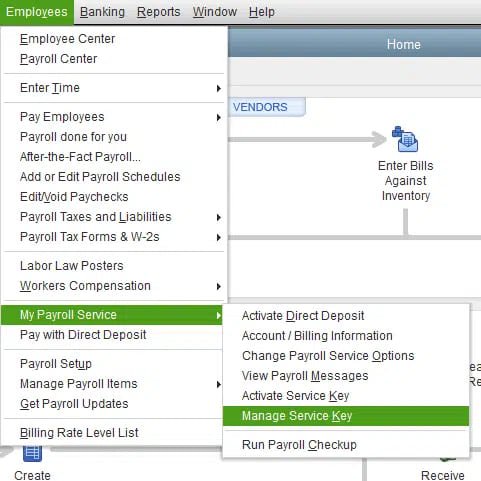
- Open QuickBooks on your system.
- Then, go to the Employees menu from the top navigation bar.
- Select My Payroll Services from the dropdown.
- Click on Manage Service Key.
- A new window will appear, then select the Edit option at the bottom.
- Review the existing service key or remove it if needed.
- Now, you have to click on the Add button.
- Then, enter your correct service key carefully.
- Click Next to proceed.
- Select Finish to complete the setup.
- You will see a payroll update message, then click OK.
- Finally, make sure the service status shows Active, and check if the issue has been resolved.
Solution 9: Re-authenticate QuickBooks
Refreshing QuickBooks licensing files can resolve access-related problems.
- Open File Explorer using Windows + E.
- Then, go to this location: C:\ProgramData\Intuit\Entitlement Client\v8.
- Look for the file named EntitlementDataStore.ecml.
- Right-click on it and choose Delete.
- Confirm the action if prompted.
- Now, open QuickBooks again.
- You will be asked to re-enter your license details. Go ahead and do that.
- Check if everything works fine.
You may also read this: How to Fix QuickBooks Error 15215
Solution 10. Re-activate Payroll Subscription
This solution helps if an inactive or canceled payroll subscription causes the error.

- Go to the Customer Account Management Portal (CAMPs) page and sign in.
- After that, on the Manage your QuickBooks page, select the product or service you want to manage.
- Then, under Products & Services, click on the Payroll Subscription tile.
- On the subscription page, check the status under the blue toolbar.
- If the status shows Canceled, click the Resubscribe link under it.
- Next, validate that the information in the Reactivate Subscription fields is correct, then click Save and Continue.
- Review the subscription and billing details carefully, then click Reactivate.
- Finally, when a pop-up confirms that your subscription has been reactivated, click Got it!
Solution 11: Repair QuickBooks Installation
Fixing damaged installation files can eliminate the error.
- Before anything else, close QuickBooks completely.
- Then, go to the Control Panel on your system.
- After that, click on Programs and Features.
- Find QuickBooks in the list and select it.
- Now, click on Uninstall/Change.
- Choose the Repair option.
- Follow the instructions that appear on the screen.
- Once the repair finishes, restart your computer.
- Finally, open QuickBooks and verify the result.
Solution 12: Use the Quick Fix My Program Tool
It helps fix common glitches in QuickBooks.

- Download the QuickBooks Tool Hub.
- Then, install it and open the program.
- Go to the Program Problems tab.
- You will see an option called Quick Fix My Program. Click on it.
- Let the tool run and complete the process.
- Once it finishes, launch QuickBooks again and test it.
Also read this: Fix QuickBooks Error 15311
Solution 13: Update the EIN (Employer Identification Number)
If your business has a new Employer Identification Number (EIN), you need to update it in QuickBooks so payroll taxes are filed under the correct federal tax ID. Here are the steps to update the EIN in QuickBooks Desktop Payroll:
- Open QuickBooks and go to Company.
- Select My Company.
- Click Edit in the Company Information window.
- From the left panel, choose Company Identification.
- Enter your new EIN in the Federal Employer Identification No. field.
- Click OK to save the changes.
Solution 14: Verify and Rebuild the Company File Data
Data damage in your company file can cause payroll errors, such as QuickBooks Error 557. Use the Verify and Rebuild Data utilities to detect and repair file issues.
Step 1: Verify the Company File Data
This step checks your company file for data damage and tells you whether a rebuild is required. Here are the steps to verify the company file data:
- Open QuickBooks.
- Click Window at the top.
- Select Close All.
- Go to File.
- Choose Utilities.
- Select Verify Data.
- After the scan, QuickBooks will show one of the following messages:
- QuickBooks detected no problems with your data: Your file is in good condition. No further action is needed.
- Your data has lost integrity: Data damage was found, and you need to rebuild the file.
- Note: If you use Assisted Payroll, contact Intuit before running Rebuild Data.
Step 2: Rebuild the Company File Data
If Verify Data finds damage, use Rebuild Data to repair the issues automatically. Here are the steps to rebuild the company file data:
- Go to File.
- Select Utilities.
- Choose Rebuild Data.
- Click OK when QuickBooks asks you to create a backup.
- Select a location to save the backup file.
- Enter a new file name so you do not overwrite your existing backup.
- Click Save.
- Once the rebuild is complete, click OK.
Solution 15: Activate the Direct Deposit Agreement as an Employee
Activating direct deposit ensures payroll information is processed correctly and can help resolve QuickBooks Error 557.
Step 1: Set Up Direct Deposit for Your Company
Before adding employee bank details, confirm that direct deposit is enabled for your company payroll account. Here are the steps to set up direct deposit:
- Sign in to your payroll account.
- Follow the on-screen instructions to complete the direct deposit setup for your company.
Step 2: Get a Direct Deposit Authorization Form
Each employee must complete and sign a direct deposit authorization form before you can add their bank details. Here are the steps to get the authorization form:
- Request the employee’s
- Voided check, or Bank routing number and account number.
Step 3: Add Direct Deposit Information for an Employee
After receiving the signed form and banking details, enter the information into QuickBooks. Here are the steps to add direct deposit information:
- Go to Employees.
- Select Employee Center.
- Choose the employee’s name.
- Open the Payroll Info tab.
- Click Direct Deposit.
- Check Use Direct Deposit for [Employee Name].
- Choose whether to deposit funds into one account or two accounts.
- Enter the employee’s:
- Bank Name
- Routing Number
- Account Number
- Account Type
- If using two accounts, enter the amount or percentage for the first account. The remaining balance will go to the second account.
- Click OK.
- Enter your direct deposit PIN when prompted.
You may also know about: QuickBooks Payroll Error 30159: How to Resolve the Issue
Conclusion
QuickBooks Error 557 interrupts payroll updates when QuickBooks Desktop cannot validate the payroll subscription or access required program components. Updating QuickBooks Desktop, reactivating the payroll subscription, correcting the service key, and repairing the installation resolve the issue in most cases. Regular maintenance helps prevent QuickBooks Error 557 and keeps payroll processing uninterrupted.
Struggling With Accounting or Bookkeeping?
Talk to our experts in minutes — No wait time!
- Free Consultation
- Fast Response
- Trusted Experts

Frequently Asked Questions
Can QuickBooks Error 557 affect multiple company files?
Yes. Subscription issues and damaged program files can trigger QuickBooks Error 557 in multiple company files.
Can Windows updates trigger QuickBooks Error 557?
Yes. Incomplete or pending Windows updates can interfere with QuickBooks payroll services.
Does reinstalling QuickBooks Desktop fix QuickBooks Error 557?
Yes. Reinstalling QuickBooks Desktop resolves the issue when damaged program files cause the error.
Can QuickBooks Error 557 occur in multi-user mode?
Yes. Subscription validation issues can affect payroll functions in both single-user and multi-user environments.
Does QuickBooks Error 557 damage payroll data?
No. QuickBooks Error 557 blocks payroll functions but does not corrupt payroll or company data.
How to Resolve QuickBooks Error PS038?
How to Resolve QuickBooks Error 2107?

