

If you’re seeing QuickBooks Error 1904 with a message like “Error 1904: [module] failed to register”, you’re not alone. This error commonly appears during or right after installation and often involves files like ICWrapper.dll, QBUpdate.exe, or msxml4.dll. But don’t worry—it doesn’t mean your company file is corrupt. The issue is usually related to system-level permissions or missing Microsoft components.
Table of Contents
- 1 What is QuickBooks Error 1904?
- 2 How to Fix Error 1904 when you install QuickBooks Desktop?
- 2.1 Solution 1: Download and then Use QuickBooks Install Diagnostic Tool
- 2.2 Solution 2: Allow the Hidden Administrator and Change Installation Settings
- 2.3 Step 2: Activate the Administrator Account
- 2.4 Solution 3: Edit Your Windows User/Account Permission Settings
- 2.5 Solution 4: Use the QuickBooks Clean Install Tool
- 2.6 Solution 5: Download and Install the Adobe Flash Player once more
- 2.7 Solution 6: Configure Damaged Windows components manually
- 2.8 Solution 7: Update Operating System
- 2.9 Solution 8: Use QBVersionTool.dll
- 2.10 Solution 9: Disable Antivirus plus the Firewall
- 2.11 Solution 10: Clean up Temporary Files
- 3 What are the Root Causes of the QuickBooks Error 1904?
- 4 What are the Major Signs of QuickBooks Installation Error Code 1904?
- 5 Final Words
- 6 Frequently Asked Questions
- 6.1 Q 1: Why does the message, We are sorry, something went wrong with the installation appear during QuickBooks Installation?
- 6.2 Q 2: Will QuickBooks error code 1904 damage my data file?
- 6.3 Q 3: Can I resolve it by doing manual solutions?
- 6.4 Q 4: How do I fix the QuickBooks registration error?
- 6.5 Q 5: What is the important reason that the 1904 module failed to register QuickBooks?
- 7 Adams Williams
What is QuickBooks Error 1904?
QuickBooks Error 1904 occurs when one or more program files fail to register during installation. The most common error message reads:
“Error 1904: Module failed to register”—followed by the name of the specific file like ICWrapper.dll, QBUpdate.exe, or Flash.ocx.
This error doesn’t usually impact your company file, but it can prevent QuickBooks from launching or running properly.
Struggling With Accounting or Bookkeeping?
Talk to our experts in minutes — No wait time!
- Free Consultation
- Fast Response
- Trusted Experts

How to Fix Error 1904 when you install QuickBooks Desktop?
Before performing the troubleshooting steps, ensure that the following points are taken into consideration:
- Update workstations and QuickBooks on the server during the multi-user mode.
- Refresh the LAN and internet connectivity.
- Windows should be updated on all the systems that are involved in running the QuickBooks in multi-user mode.
- Ensure that QuickBooks are run in admin mode.
To fix the error message code 1904, first, you need to make sure that you are signed in as an Administrator account.
Complete the steps below and pay attention to the details:
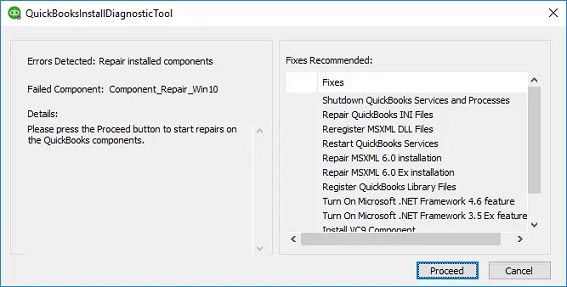
Solution 1: Download and then Use QuickBooks Install Diagnostic Tool
Using the QuickBooks Install Diagnostic tool can help you resolve this QuickBooks Installation error with ease.
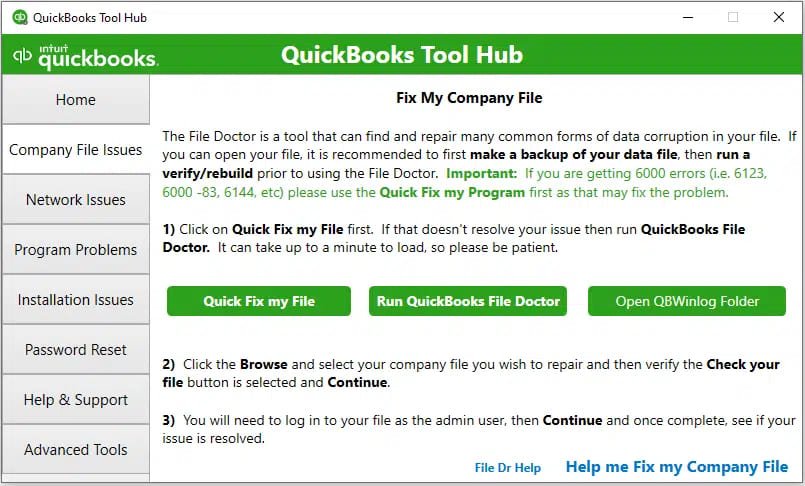
Step 1: Run the QuickBooks Tool Hub
The QuickBooks Tool Hub has all the important tools in QuickBooks that can assist you in fixing the error 1904 while installing the application.
- Download the current version of the QuickBooks Tool Hub.
- Now save it in a preferable location.
- Now open the QuickBooksToolHub.exe file downloaded from the particular saved location.
- Next, complete the instructions given on-screen and agree to the conditions and terms.
Step 2: Run QuickBooks Install Diagnostic
- Press twice on the Tool Hub icon in order to open it.
- In the tools, press Installation Issues.
- Now open the QuickBooks Install Diagnostic Tool to repair the common installation issues.
- All the Diagnosis to finish. Next, restart the system and then open QuickBooks.
After everything is complete, try to install QuickBooks to see if the error 1904 persists or not. In case it is not fixed, try the next troubleshooting method.
By allowing the hidden administrator and enabling installation settings, the error 1904 can be fixed with ease:
Step 1: Use the Hidden Administrator Account
- Use the Command Prompt with Admin Rights.
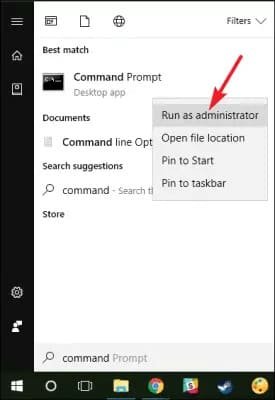
- Click the Windows key on your particular keyboard.
- Enter CMD in the search bar. Press right-click on Command Prompt and choose Run as Administrator.
Step 2: Activate the Administrator Account
- In the particular Command Prompt screen, enter Net User Administrator/active: yes and click Enter.
- In case any issue arises, try entering Net User Administrator/active and click Enter.
Step 3: Move to the Administrator Account
- Click Ctrl+Alt+Delete together and then choose Switch User. For those who are Windows 8 users, click the Windows key and choose the user icon present at the top-right side of the window.
- Click the CTRL+Alt+Delete key once more and choose the default Administrator account icon.
Step 4: Now deactivate the Administrator Account
- Click the Windows key.
- Now enter CMD and press right-click on the Command Prompt, choosing Run as Administrator.
- In the Command Prompt, enter “net user administrator /active:no” and click Enter.”
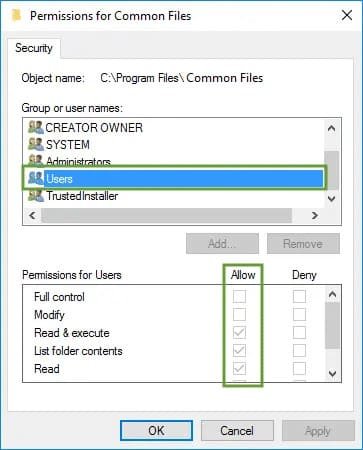
Step 5: Change Installation Folder Security Settings
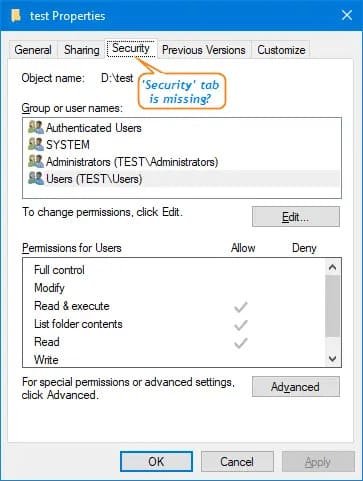
- Go to C:\Program Files\Common Files.”
- Press right-click on the Common Files folder and choose Properties.
- In the Security tab, press the Edit button and then choose Users.
- In the section for Permissions for Users, allow the following permissions:
- Read and Execute
- Read
- Modify
- List Folder Contents
- Write
- Lastly, press Apply and then click OK.
Step 6: Install QuickBooks once more
- Install QuickBooks once more.
- Now after the installation, get back to your actual user account.
Solution 3: Edit Your Windows User/Account Permission Settings
You need to change to a Windows Administrator account to alter certain settings:
- Click the Windows button on your keyboard. You can also press the bottom left side of the screen.
- Now type CMD in the given search bar and choose Run as Administrator.
- Now, after the command prompt screen appears, enter Net User Administrator/active: yes.
- Now press the Enter tab.
- Now quit the command screen.
- Now press the Windows start icon and then choose your account name.
- Now press on Sign Out.
- Finally, go to the Account that is labelled as Administrator and attempt to sign in there. Complete all the login information, in case you have any, or you can leave it blank.
Note: In case after implementing all the steps mentioned above, the error 1904 is still not resolved, you need not worry. You can start implementing the next solutions.
Solution 4: Use the QuickBooks Clean Install Tool
If you are facing problems that cannot be fixed by just uninstalling the program and then reinstalling it, you can use the QuickBooks Clean Install tool. This tool is created to erase program files that may not go away even after normal uninstallation.
Here is a list of the steps that can assist you to use the clean install tool efficiently:

- Download the QuickBooks Tool Hub and then install it.
- Open the tool hub and choose Installation Issues.
- Select Clean Install Tool and then implement the on-screen guidelines to uninstall QuickBooks.
- After QuickBooks is uninstalled, navigate to the tool hub and access the QuickBooks Install Diagnostic tool to assist with the reinstall process.
Note: Make sure that you have uninstalled the QuickBooks Desktop version you are experiencing problems with prior to running the clean install tool. Also, make sure that the product ID and license key are easily available when required.
Solution 5: Download and Install the Adobe Flash Player once more
To uninstall the Adobe Flash Player and install it again, follow the steps given below:
- Download the QuickBooks Install Diagnostic Tool and run it.
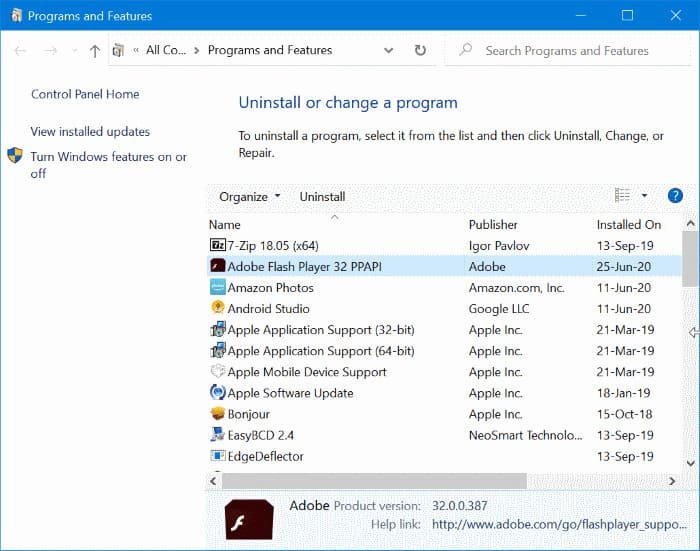
- Now, press the Start menu and type Control Panel in order to open it.
- Now, you need to navigate to the option, Uninstall a Program.
- Choose Adobe Flash Player ActiveX from the programs list and select Uninstall.
- Now, implement the instructions available on-screen to finish the uninstall procedure.
- Download the Adobe Flash Player and then install it again.
Solution 6: Configure Damaged Windows components manually
Here are the steps to manually configure damaged Windows components:
Step 1: Fix the .NET Framework
- In order to fix it, the user is required to move to the Control Panel and resolve problems concerning the Microsoft .NET Framework.
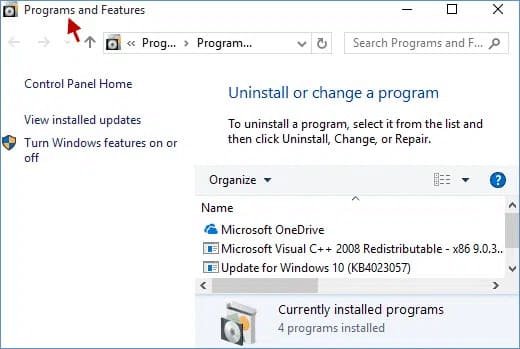
- Now, from the installed programs list, choose .NET Framework.
- Now, shift to the Programs and Features page.
Step 2: Register the MSXML.dll
For 32 Bit OS
- Firstly, click Windows + R in order to open the Run screen.
- Press Enter to include the cmd in the box.
- Add “regsvr32 MSXML6.dll”
- Press the Enter tab once more to move ahead.
For 64 Bit OS
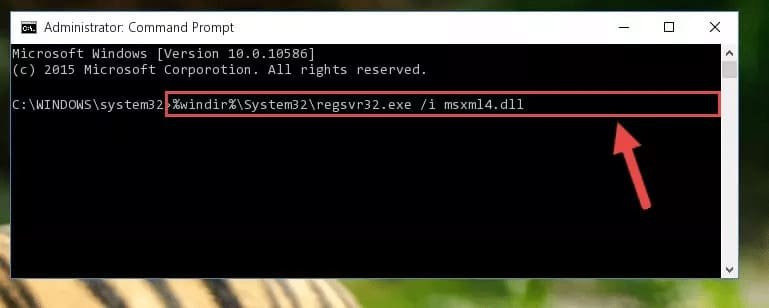
- The user must click the Start tab.
- Now, add CMD in the search bar.
- Now, you need to right-click on the CMD icon, and it will open the context menu.
- Choose the Run as Admin tab.
- Once the window opens the command prompt, add cmd and acquire the C: root directory.
- Now, click the keyboard shortcut “CD windows/ syswow64 /”.
- After finding syswow64, add “regsvr32 MSXML6.dll”
- Now press Enter again.
- Attempt to install QuickBooks and find out if the issue is resolved or not.
Solution 7: Update Operating System
The QuickBooks error code 1904 can be fixed by updating the operating system. There are many benefits of updating the operating system to its current version including developed functions and tools to erase technical issues in your system.
Hence, updating the operating system is important:
For Windows 8.1
If any user is using the Windows 8.1 operating system, the following steps should be performed:
- First, press the Windows icon and click on the Settings option.
- Now select the Change PC settings option.
- Now press the Update and Recovery option and choose Windows Update.
- Now, select the Check Now link.
- After the update is downloaded successfully, the user needs to select the View Details option to move ahead.
- In the updates list, you may witness many update options along with their downloaded sizes.
- Finally, reboot the system and sign in to QuickBooks.
For Windows 10
Users who are accessing Windows 10 must perform the steps given below:
- First, you need to press the Windows icon and click the Settings option.
- Now choose the Update and Security option.
- Now select the Windows Update option.
- Now, press the Check for Updates option to begin the process.
- In case there are any new updates, the choices will be restored.
- Choose all important and important updates, and then press Update to begin downloading them.
- Finally, reboot the system after the updates are downloaded successfully.
Update to Windows 11
Here are the steps for Windows 10 to update to Windows 11:
- Navigate to the Settings option and then click Update and Security. Now press Windows Update.
- Now press Check for Update.
- Now install any possible updates.
- In case there are no updates present, it is possible to update the Manually Update Catalog Website manually.
- Download the required updates and install them.
Solution 8: Use QBVersionTool.dll
When you witness the QBversionToll.dll file reference in error 1904 notification in QuickBooks, you need to run the QuickBooks Install Diagnostic tool and change the admin settings to move ahead with the steps:
Step 1: Permissions Test
- First, you need to do a permissions test with the help of the steps given below:
- Open the search menu in Windows and enter Notepad to find and open it.
- Enter QBTest in the available notepad and implement it by saving the particular note to any two spots:
- C:\Program Files(x86)\Common Files
- C:\Program Files\Common Files
- In case you fail to save it, you may be required to sign in as Admin and install QuickBooks.
Step 2: Install QuickBooks as Admin
- Now, you need to install QuickBooks as Admin with the help of the steps given below:
- Navigate to the Windows Start menu and choose the Sign-out option.
- Move ahead by selecting the account that says Admin and then signing in. Make sure the password is not seen.
- Now, as Admin, finish the installation of QuickBooks.
Solution 9: Disable Antivirus plus the Firewall
Another method to fix the installation error in QuickBooks is disabling the Antivirus program along with the Firewall:
- Disable the Antivirus Program Temporarily
- Find your Antivirus program icon on the screen of your system.
- Press right-click on the Antivirus icon and a context menu will come up.
- Select to Disable the Antivirus software you are using and press it.
- Choose the duration. Some Antivirus programs enable you to select how long you wish to disable them, like for 30 mins, Disable until restart, etc. Choose the option that is perfect for your needs.
- Turn off the Microsoft Defender Firewall
- Use the Start Menu by pressing the Start button present on the bottom left of your window.
- Press the Settings options.
- After you enter the Settings window, search for the option, Update and Security, and press on it.
- On the left side, you will witness several options. Select Windows Security.
- Now, search for and press Firewall and Network Protection.
- Based on the connection, you may find options like Private Network, Public Network, or Domain Network. Choose the network profile that is presently active or the one you wish to move ahead.
- In the selected network profile, you will witness an option, Microsoft Defender Firewall. There must be a button to turn it off. Press the switch button to disable the firewall.
Note: Your computer may become vulnerable if you disable your firewall or antivirus software. When you’re finished with chores that call for their temporary deactivation, it’s crucial to turn them back on. When these safeguards are disabled, always be sure you’re downloading or viewing reliable content.
Solution 10: Clean up Temporary Files
Cleaning the temporary files can help you fix installation problems with the help of the steps given below:
- Click the Windows + R keys in order to open the Run command.
- Type %temp% and click Enter.
- A folder with temporary files appears. Click Ctrl + A to choose all files and then press Delete.
- Conduct a System Restore. In case none of the solutions stated above work and resolve the problem, you can try to do a system restore to get your computer back to a state where QuickBooks is functioning without any problems.
- Look for System Restore in the search bar of Windows and choose it.
- Press Next on the screen that appears. You will witness a list of restore points along with dates. Select a date when QuickBooks was working properly and press Next.
- Implement the prompts to finish the system restore. This will not impact your personal files; however, it may uninstall the current software and drivers.
What are the Root Causes of the QuickBooks Error 1904?
Several factors can lead to the error 1904 module failed to register QuickBooks message:
- Permission issues on your system or with the Windows user account
- Corrupt Microsoft Visual C++ Redistributables
- Outdated or missing .NET Framework
- Incorrect Windows or QuickBooks installation
- Security software is blocking file registration
- QuickBooks installation does not run as an administrator
What are the Major Signs of QuickBooks Installation Error Code 1904?
Here are some of the key symptoms that users may experience when dealing with the installation error 1904:
- Permission and many other glitches will impact the hard drive functionality along with other read-write devices.
- The speed of the system will reduce significantly.
- A recurring message, “Error 1904: [file path/name/extension] failed to register” gets displayed on the window.
- Automatic updates for the computer are not present.
- Company files are required to be added every now and then.
- The system stops responding or starts responding late.
Final Words
In today’s article, we have provided enough information to help QuickBooks users experiencing the 1904 error. We have shared the causes, symptoms, and effective troubleshooting steps to help you deal with this technical issue.
Still, it is quite likely that some of you may get stuck while implementing some of the steps. In such a scenario, you can reach out to QuickBooks professionals. You can also contact our QuickBooks experts for prompt results.
Frequently Asked Questions
Q 1: Why does the message, We are sorry, something went wrong with the installation appear during QuickBooks Installation?
Ans: The issue generally shows that there is a problem with your QuickBooks installation like problems with the Windows operating system or installation of corrupted files, etc. In such a case, you need to download the QuickBooks installation file again or review the Windows settings.
Q 2: Will QuickBooks error code 1904 damage my data file?
Ans: No. Since it is concerned with software installation. Hence, the data will be safe and undamaged.
Q 3: Can I resolve it by doing manual solutions?
Ans: Yes, you can do manual solutions to resolve it. These solutions are:-
- Clean and install QuickBooks software.
- Uninstall the QuickBooks Desktop.
- You can run the Diagnostic Tool of QuickBooks.
- Also, rename the folders of QuickBooks software.
Q 4: How do I fix the QuickBooks registration error?
Ans: Fix other activation or registration errors
- Download the QuickBooks Tool Hub. The QuickBooks Tool Hub helps fix common errors. You’ll need to close QuickBooks to use the tool hub.
- Run Quick Fix from the Tool Hub. In the QuickBooks Tool Hub, select Program Problems. Select Quick Fix My Program.
Q 5: What is the important reason that the 1904 module failed to register QuickBooks?
Ans: The main reason is that there is a file or component that is damaged, missing, or corrupted. The file location may be wrong which is why your file is missing while running the QuickBooks Desktop software.

Adams Williams
Adams Williams is a seasoned accounting professional with over 4 years of experience in bookkeeping, financial reporting, and business accounting solutions. Specializing in QuickBooks software, Adams combines technical expertise with clear, accessible content writing to help businesses streamline their financial processes. His insightful guides and how-to articles are crafted to assist both beginners and seasoned users in navigating accounting software with confidence.

