Nobody likes to lose their financial or accounting files when it comes to QuickBooks; losing one is surely a nightmare. You are probably looking for the best ways to recover QuickBooks data from the hard drive if you unintentionally deleted a part of your data. So, we have put together a list of the most efficient ways to retrieve a QuickBooks file from a hard drive.
A hard drive can save your life if you need to save data, but it also carries risks that could result in you losing all of your data. But if you know how to retrieve QuickBooks data from your hard disk, things will go more smoothly.
By calling the QuickBooks data recovery service number, you can get in touch with the QuickBooks technical support staff if you are experiencing problems retrieving your data. But if you want to solve this problem on your own without seeking the advice of a technical expert, the D-Back Hard Disk Recovery Expert is here to alleviate your concerns.
With iMyFone D-Back Hard Drive Recovery Expert, you may recover any form of data, including deleted QuickBooks data and Xbox game saves. This outstanding software is frequently cited as the quickest way to recover all of your data in a matter of minutes.
What Causes QuickBooks Lost Data
QuickBooks lost data can have several causes. There are a few reasons for data loss from accounting software.
- It is advised to have a backup because you can lose your data while updating your QuickBooks version.
- The issue might have emerged as a result of malware or virus attacks.
- Data corruption may occur as a result of the disruption of certain critical functions.
- Improper storage and access to multiple company files on the same system might potentially result in data loss.
- System breakdowns or power outages can corrupt files.
- Unintentional deletion of data.
It strongly advised you to download D-Back Hard Drive Recovery Expert for free if you have experienced data loss on QuickBooks and are looking for the fastest way to recover the lost QuickBooks data. Most significantly, it may help you in recovering the lost QuickBooks data in an entirely safe way.
Let's see How to Put Various Data recovery methods with or without iMyFone:
Method 1: Using QuickBooks Recovery Tool-iMyFone D-Back Hard Drive Recovery Expert (Best Way)
You've just gained insight into how this software promotes the optimal solution for recovering QuickBooks data, thanks to the incredible features we've discussed earlier.
When you delete a file, it remains concealed on the hard drive, allowing D-Back Hard Drive Data Recovery to locate and retrieve it using its robust algorithms. The process involves just three steps: Select > Scan > Preview & Recover. Let's explore how to do it!
Step 1. Software Download and Installation
Continuing your data recovery with this software begins with installing the software.
The software is compatible with many Windows and Mac operating systems, so you can download the version that's right for your computer.
Step 2. Scan up your file
Now that the software is installed, it's time to select the location you need to recover and click scan to start the scanning process.
Step 3. Preview Your File to Check the Data to Recover
Once you've conducted a thorough scan of your files, you can preview and promptly recover your desired files. Simply choose the file you want to retrieve and click the "recover" button. Following that, specify the location where you'd like to restore the file.
You've completed the file recovery process. This is how you can retrieve any of your QuickBooks licenses or files using the D-Back Hard Drive Recovery Expert. You can easily obtain your lost QuickBooks data from a hard drive by downloading this software for free.
Method 2: Using Company Files
You can restore the lost transaction by utilizing the current Transaction Log file (.TLG) in conjunction with a copy of your company log file (.QBW.adr).
Follow these steps to copy a few files into a new folder:
Step 1. Copying your TLG. and .QBW.adr. file into a new folder
- Begin by creating a new folder named "QBTest" on your desktop.
- Next, locate the company's saved location on your computer. You can usually find this information on various screens within the company and product information sections.
- Once you've identified the location, proceed to copy and paste the TLG file into the "QBTest" folder you just created.
- After successfully copying the TLG file, now it's time to locate the QBW.adr folder. This folder can typically be found in the same location as the company file.
- Once you've located it, copy and paste the QuickBooks Auto Data Recovery File into your "QBTest" folder. Be sure to rename the QBW.adr file to QBW for compatibility.
Step 2. Recovery through QuickBooks
- Having successfully copied the TLG and QBW files, proceed to open QuickBooks.
- Once QuickBooks is open, navigate to the "QBTest" folder and open the TLG file.
- Utilize the account register to double-check the completeness of recorded transactions.
- To ensure the company file's integrity, use the "verify" utility option.
- If the company file passes the integrity check, relocate the damaged file to a different location.
- Finally, transfer the copy of the company file from the "QBTest" folder back to its original location.
Method 3: Using QB Data Recovery File
Using the QB data recovery file, you can also retrieve your data, but you have to use .TLG and .QBW files.
- To continue, begin by establishing a new folder called "QBtest."
- Search for the QuickBooks Auto Data Recovery file on your computer and make copies of both the .TLG and .QBW.adr extension files.
- Subsequently, place these copied files within the "QBtest" folder.
Tips to Backup and Restore a QuickBooks Files/Data Desktop
The tips that follow can be used to back and restore QuickBooks files:
1. Backup QuickBooks Data Desktop :
If you want to keep your data secure, make sure your QuickBooks company file gets regular backup. The automatic backup feature in QuickBooks can help you stay up with your data and guarantee that you won't lose any files as a result of particular problems. To get a QuickBooks desktop with automated backup, you have to simply follow the steps listed below.
- Make a backup of your QuickBooks files.
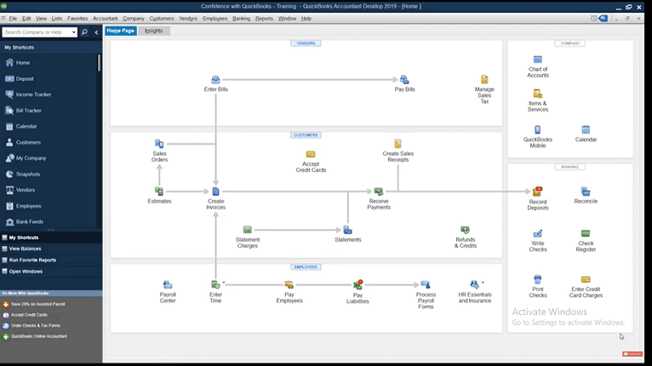
- You have to open up the QuickBooks dashboard.
- On the upper left side, you have to go to the File option. From the drop-down menu, you have to choose the backup company and now you have to click on Create Local Backup.
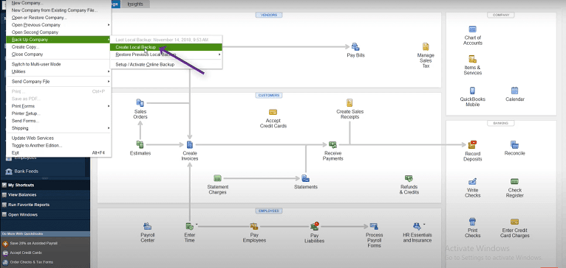
- Then you have to click on Next.
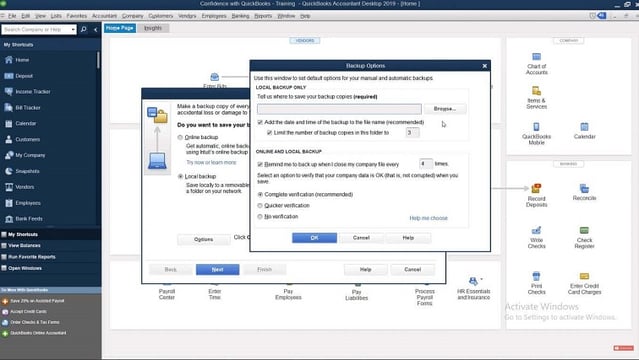
- Then you have to choose a folder or location that you want to locate, and then you have to navigate to it.
- Now you have to set up your preference.
- You have to select the option to include the backup file's date and time.
- You have to set a limit on how many backups you want to keep at any given moment.
- Make a note in your calendar to back up a company file at a specific time.
- When you save, select the option to verify that the company data is accurate
- It's best to verify everything twice.
- When prompted to confirm that you want to save the file to your local computer, you have to choose yes and continue.
2. Restore QuickBooks Data Desktop
Follow the easy steps below to restore your QuickBooks data desktop:
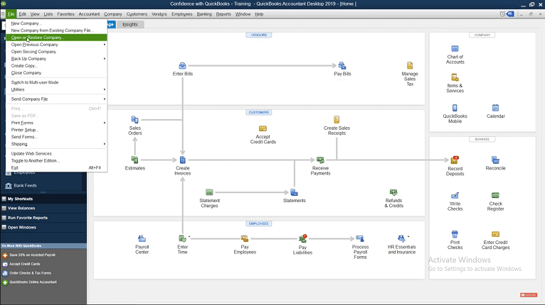
- In QuickBooks, you have to go to the file menu and select the open or restore company option.
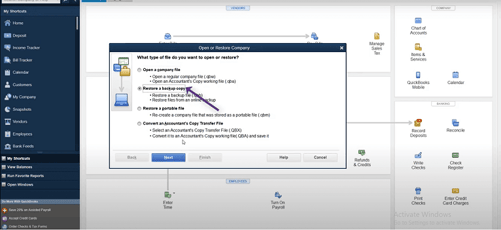
- Click next after choosing to restore the backup copy.
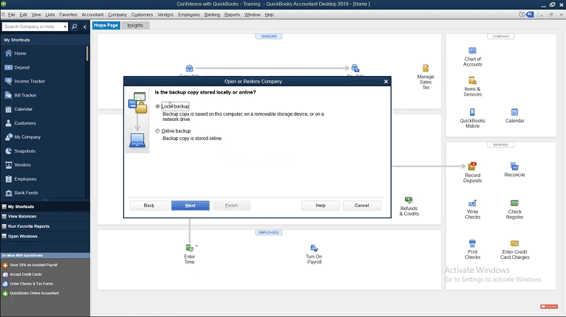
- You have to click on local backup and then you have to click Next.
- You have to look for your backup business file on your computer. Here's how it ought to appear: [Yourcompany name]. qbb.
- Select a folder as the location for your recovered corporate file. then select Open.
- When finished, you have to choose Save. If you ever get a message that your data might be overwritten, you have to pick the solution that works best for you.
FAQs About QuickBooks Data Recovery
How can you Recover QuickBooks Files from a hard drive?
Using the methods that we have already stated above, you can recover QuickBooks files from the hard disk. Using the iMyFone D-Back Hard Drive Recovery Expert is one of the best and easiest solutions.
How Do I Back Up QuickBooks to a Hard Drive?
Transfer your data to a hard drive by copying the QuickBooks Auto-Data Recovery folder directly to the hard drive by making a new QuickBooks Test folder if you want to back up your data to an external hard disk.
Where Can I Find the License Number for QuickBooks on the Hard Drive?
- First, you have to select the Company tab.
- Then you have to choose My Company from the dropdown menu option.
- Then on the right side you have to go to Manage your account. Your license number can be found there along with the product key.